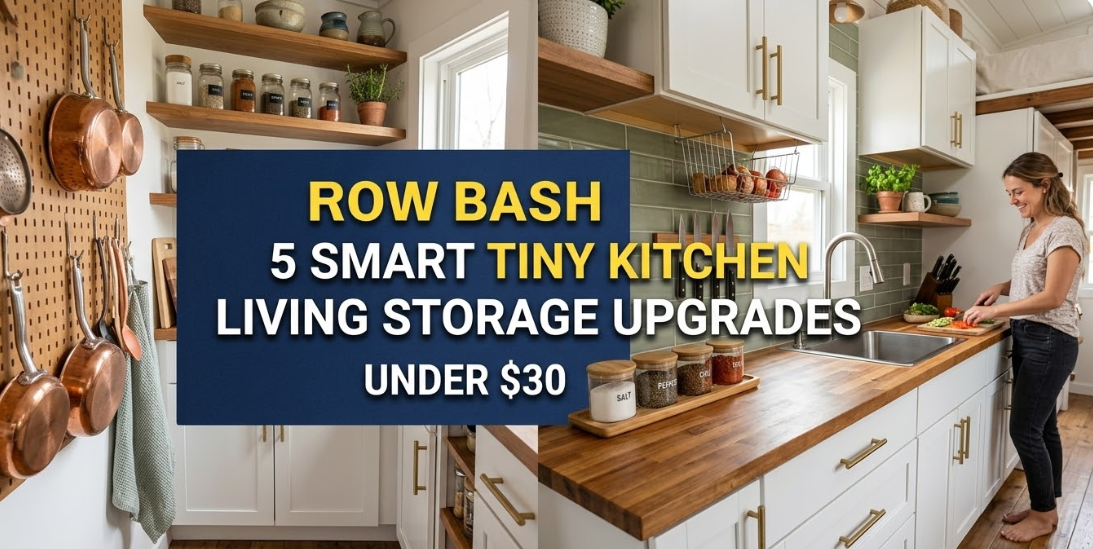
Meta Description: Budget tiny kitchen living storage ideas that look really expensive can setup small space in a blissful way as long as you do not get broke. Explore 12 smart, chic solutions here.
Budget Tiny Kitchen Living Storage Ideas That Look Expensive: 12
Tired of your tiny little kitchen driving you up a wall? Messy counters, no space to cook and storage that never feels like enough — sound familiar?
The good news is you don’t have to do a full renovation or have a huge budget to correct it.
With the right storage solutions in place, even the tiniest of kitchens can feel sleek, organized — and surprisingly high-end. The key is knowing which tricks really work — and which are just a waste of money.
In this guide, we take you through 12 budget tiny kitchen living storage ideas that really look expensive. Each one is practical, budget-friendly and easy to pull off — even if you’re a renter.
Let’s get into it.
Why Small Kitchen Storage Is More Important Than You Think
An untidy kitchen is more than just unseemly. It takes longer, stresses you out and makes cooking feel like drudgery.
Research indicates that untidy environments raise our cortisol levels — the stress hormone. So sprucing up your kitchen storage isn’t just cosmetic. It’s about how you feel every single day.
The best part? You don’t have to break the bank. The majority of the ideas below are under $30 each. Some cost nothing at all.
The #1 Golden Rule of Tiny Kitchen Storage
Before diving into the ideas, here’s a rule to remember:
Go vertical, not horizontal.
Small kitchens don’t have real estate to spare. But walls? Walls are free real estate. Every idea on this list utilizes vertical space in some capacity. So keep that mentality and you will always find space.
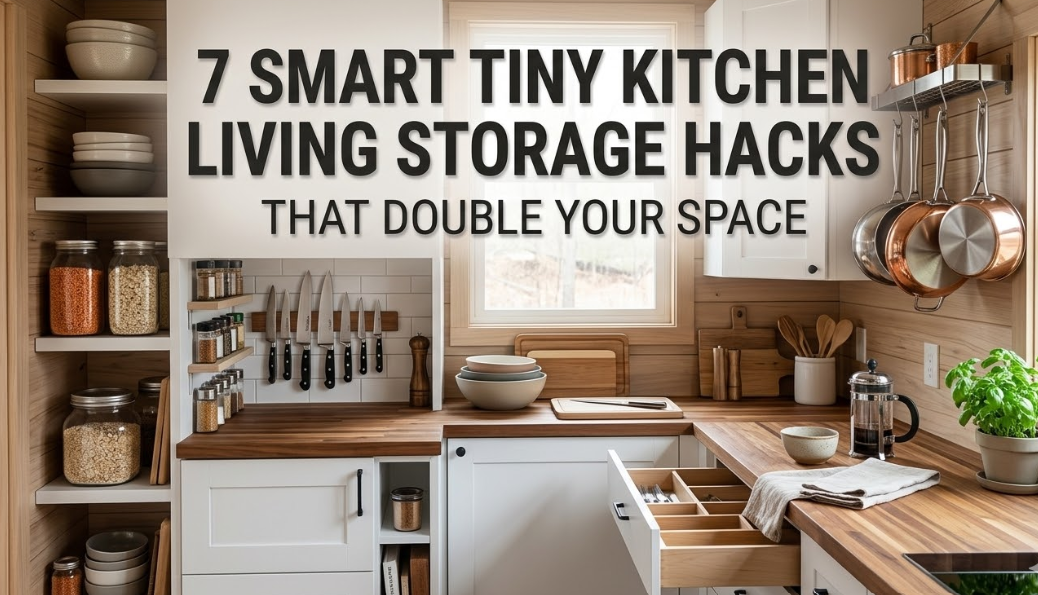
1. Floating Shelves That Steal the Look of Custom Cabinetry
Floating shelves are the single most impactful budget upgrade you can tackle.
When installed correctly, they look like they were built into the wall. That’s a pricey, bespoke look — for $15–$40 in materials.
How to Do It Right
- Opt for wood shelves with a light stain or white paint finish
- Space them evenly (about a foot apart)
- For a more high-end slant, run small LED strip lights under them
- Show off matching jars, stacked plates or cookbooks
The key is keeping them tidy. A cluttered floating shelf makes the display look tacky. A curated one looks like something out of a home magazine.
What to Store There
- Spices in matching glass jars
- Mugs hung over little hooks beneath the shelf
- Cutting boards propped upright in a simple holder
- A plant or two to create some warmth
Estimated Cost: $20–$50
2. Magnetic Knife Strips in Place of a Knife Block
There’s a heavy wooden knife block taking up space on your counter.
A wall-mounted magnetic knife strip? It holds the same knives, clears counter space, and frankly looks so much more professional.
Step into any restaurant kitchen or chef’s home — there they are, a magnetic strip. It’s a little detail that announces “serious cook” without a word being spoken.
Installation Tips
- Place it at eye level next to your prep area
- Keep knives clean and blade-side facing out
- Style it with hardware in a similar colorway for a cohesive look
Magnetic knife strips are often available for as little as $10–$25 online or in home stores.
Estimated Cost: $10–$25
3. Tension Rods in Cabinet Drawers and Shelves
This is that one concept which may seem really basic yet can alter how the cabinets function.
Tension rods — the type that hold up curtains — can be used inside cabinets to make vertical dividers. All of a sudden, your baking sheets, cutting boards and pan lids are standing upright rather than piled up in a disheveled heap.
Where to Use Them
| Location | What It Organizes |
|---|---|
| Under sink cabinet | Cleaning spray bottles |
| Deep lower cabinet | Sheet pans, cutting boards |
| Wide drawer | Separating utensils or linens |
| Cabinet shelf | Pot lids standing vertically |
They are $3–$8 each and involve zero tools or drilling.
Estimated Cost: $5–$15 total
4. A Pegboard Wall — The Most Flexible Storage
Pegboards have long been used in garages. But when styled right, they look fantastic in a kitchen.
The devil is in the execution. A raw pegboard looks like a workshop. A pegboard painted white or pastel, with matching metallic hooks? That looks like a kitchen feature straight from Pinterest.
How to Style Your Pegboard
- Paint it to match your wall, or use a contrast color (black pegboards are really in right now)
- Decide on matching hooks — all gold, or all black, or all white
- Add small baskets, pots or utensils, even a mini chalkboard for notes
- Stick in a few small potted herbs in clip-on planters
A complete pegboard system — the board and hooks — can hold 20 to 30 kitchen items for about $20 to $40.
Estimated Cost: $20–$45
5. Transparent, Stackable Containers for Pantry Items
This one does more to transform your pantry or open shelves than just about anything else.
When you decant your dry goods — pasta, rice, flour, sugar, cereal — into clear and matching containers, everything feels suddenly intentional and organized. It’s the same trick used in staged homes and luxury kitchens.
What Makes Clear Containers Work So Well
- They make it obvious when you’re running low
- They stack well, using vertical space inside cabinets
- The visual consistency makes even a hodgepodge shelf look curated
- They also protect food from moisture and pests
You do not need to invest in an expensive set. IKEA, Amazon or dollar stores have perfectly acceptable affordable options. Print labels using a label maker, or use chalkboard stickers for handwritten tags.
Estimated Cost: $20–$50 for an entire set
6. Over-the-Cabinet-Door Organizers
In most kitchens, the back of your cabinet doors is dead space.
Over-the-door organizers — the kind that hang on a door via hooks — can hold foil, plastic wrap, pot lids, cleaning supplies and more.
Best Items to Store Over-the-Door
- Rolls of aluminum foil and plastic wrap
- Cutting boards
- Small cleaning supplies under the sink
- Packets of spices and small seasoning packets
- Reusable grocery bags
These organizers are generally about $10–$20 and install in less than two minutes with no tools required.
Estimated Cost: $10–$20
Budget vs. Splurge: A Quick Cost Comparison
Here’s a quick look at how these storage solutions stack up in cost versus visual impact:
| Storage Idea | Estimated Cost | Visual Impact | Difficulty |
|---|---|---|---|
| Floating shelves | $20–$50 | Very High | Medium |
| Magnetic knife strip | $10–$25 | High | Easy |
| Tension rods | $5–$15 | Medium | Very Easy |
| Pegboard wall | $20–$45 | Very High | Medium |
| Clear containers | $20–$50 | Very High | Easy |
| Over-door organizers | $10–$20 | Medium | Very Easy |
| Under-shelf baskets | $10–$25 | High | Easy |
| Corner lazy Susan | $15–$35 | High | Easy |
| Drawer dividers | $10–$30 | Medium | Easy |
| Hanging pot rack | $25–$60 | Very High | Medium |
| Fridge side organizers | $10–$20 | Medium | Very Easy |
| Tiered shelf risers | $10–$25 | High | Easy |
7. Under-Shelf Baskets That Add a Layer of Storage
There’s a gap of space available between the shelf surface and items stored below. Under-shelf baskets slide right over the shelf itself and hang down, forming a whole new layer of storage.
They’re brilliant for:
- Extra mugs or small cups
- Kitchen towels or oven mitts
- Small snack bags or packets
- Napkins or paper towels
They are around $10–$25 and can look surprisingly polished when everything inside is neat and organized.
Estimated Cost: $10–$25
8. A Corner Lazy Susan for Dead Corner Space
Corner cabinets are notoriously useless. Things get sent to the back and then forgotten. Sound familiar?
A lazy Susan — a round, spinning tray — fixes this problem entirely. Just a spin and everything becomes accessible. No more reaching to the back of the cabinet.
Best Uses for a Lazy Susan
- Spices and condiments
- Oils and vinegars
- Canned goods
- Cleaning supplies under the sink
Two-tier versions are particularly handy because they effectively double up the storage in one cabinet slot.
Estimated Cost: $15–$35
9. Drawer Dividers for a Neat, Purposeful Vibe
Open a junk drawer. Now picture that same drawer, except every item has its own little section — sorted.
That is the power of drawer dividers.
Bamboo dividers look expensive and tidy. Cheap, adjustable plastic ones are functional. Regardless, organized drawers are a sign of a high-functioning, well-kept kitchen.
What to Organize With Dividers
- Utensils (spatulas, spoons, whisks)
- Silverware
- Junk drawer miscellaneous items
- Baking tools and small gadgets
Estimated Cost: $10–$30
10. A Pot Rack That Hangs and Becomes Decor
Nothing adds more of a “serious chef” look to a kitchen than pots and pans hanging overhead or on wall-mounted racks.
And it’s extremely functional. Pot racks have pots and pans out in the open, freeing up an entire lower cabinet.
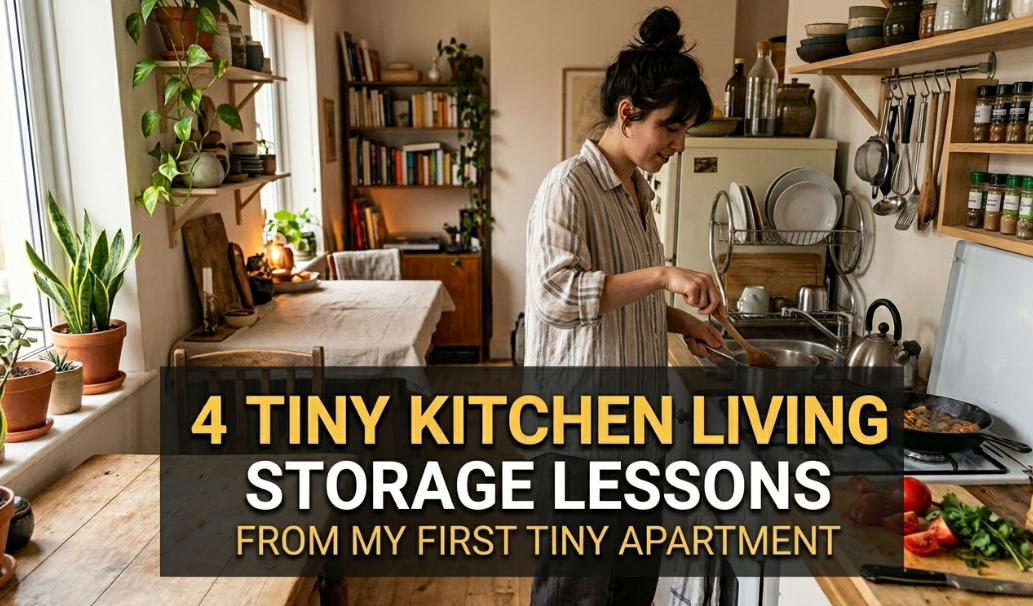
If you’re looking for more small kitchen inspiration like this, Tiny Kitchen Living is a great resource packed with clever ideas for making compact spaces work beautifully.
Types of Hanging Pot Racks
Ceiling-mounted: Suspends from the ceiling above an island or counter — practically stunning, but drilling is required.
Wall-mounted: Attaches to the wall; great for small kitchens without overhead space.
Over-the-door rack: Hangs on the back of a pantry door — no installation necessary.
For a budget option, an over-the-door version runs $25–$40 and does an excellent job.
Estimated Cost: $25–$60
11. Side-of-Fridge Magnetic Organizers
Another highly neglected piece of real estate is the side of your fridge.
Magnetic organizers — strips, baskets, and pocket organizers — attach directly to the surface of the fridge. They’re perfect for:
- Storing foil, plastic wrap and parchment paper
- Holding paper towels
- Organizing mail, pens and a mini notepad
- Hanging a small chalkboard or dry-erase board
These are especially helpful in small kitchens where not a single surface goes unused.
Estimated Cost: $10–$20
12. Tiered Shelf Risers Inside Cabinets
Standard cabinet shelves are flat. That means everything is on a single level and things are piled up — inefficient and annoying.
Tiered shelf risers solve this problem by providing two or three levels within a single cabinet space.
Where They Work Best
- Spice cabinet: View all bottles at a glance
- Canned goods shelf: No more digging behind rows of cans
- Mugs and cups: Shorter items in front, taller in back
- Bathroom cabinet (bonus tip): Also works there
Risers made of bamboo or chrome metal look the most professional. According to Good Housekeeping’s kitchen organization guide, tiered risers are consistently ranked among the top cabinet organizers recommended by professional home editors.
Estimated Cost: $10–$25
Styling Secrets — How to Make Budget Storage Look Expensive
Step one is getting the right organizers. Styling them well is step two.
Here’s what makes a kitchen look expensive versus “cheap but organized”:
Stick to a Color Palette
Pick two or three colors max. White and wood. Black and gold. White and chrome. When everything is in sync, the kitchen looks deliberate — not cobbled together.
Decant and Label Everything
Store-bought packaging looks cluttered. Transfer things into matching containers. Add simple, clean labels. This one habit changes the whole look of your kitchen.
Less Is More
You don’t need to fill every shelf or organizer as high as it goes. Leave a little breathing room. Negative space is what makes a thing look curated as opposed to crammed.
Choose Textures That Look Premium
Bamboo, matte black metal, brushed gold and clear glass all photograph and look luxurious. Bright plastic does not. Try to stick with neutral, natural or metallic finishes when it makes sense.
Small Kitchen, Big Impact: A Room-By-Room Game Plan
Feeling overwhelmed? Here’s a rough priority order of where to start:
Start with the counters. A decluttered countertop instantly makes the kitchen feel larger and cleaner. Purge things you don’t use on the daily.
Next, move on to the insides of cabinets. Add lazy Susans, shelf risers and dividers. You’ll find space that seems as if you doubled your storage in an instant.
Next, hit the walls. Floating shelves, pegboards or magnetic strips belong here. This is where the visual transformation takes place.
Finally, the doors and fridge. Finishing touches include over-door organizers and magnetic side organizers.
Frequently Asked Questions
Q: Can I make these upgrades if I’m renting?
A: Many of these concepts are removable and wouldn’t involve any drilling or permanent changes. Tension rods, over-door organizers, magnetic strips and freestanding shelving are all renter-friendly. In the case of floating shelves, use command strips that are rated for heavier loads — they work well for lightweight shelving.
Q: What’s one change that would make a big difference to a small kitchen?
A: Transparent containers + matching labels on open shelving or a pantry space. It makes more visual difference than almost anything else, and costs less than $50 for a full setup.
Q: Can I use floating shelves to hold heavy items, like cast iron pans?
A: It depends on how they’re mounted. Good floating shelves can hold a lot of weight if they are firmly anchored into the studs with appropriate screws. If you have cast iron and heavy pots, a wall-mounted pot rack — or pegboard with heavy-duty hooks — is a safer and sturdier choice.
Q: What’s the secret to keeping open shelves looking neat?
A: The short answer: edit ruthlessly. Display only functional and beautiful pieces. Put everything else behind closed doors. Also, straighten up open shelves in 2 minutes once a week.
Q: What color scheme looks the most expensive for a tiny kitchen?
A: White, cream or light gray for walls and major surfaces. Then add warmth by incorporating natural wood tones (bamboo containers, wooden cutting boards). Use black or gold hardware accents for contrast. This classic pairing always feels polished and expensive.
Q: Do I have to purchase everything at once?
A: Not at all. First tackle the highest-impact, lowest-cost items — clear containers, a lazy Susan, drawer dividers. Then, when you’re ready, add floating shelves or a pegboard. There is nothing wrong with assembling your storage system a piece at a time.
Wrapping It All Up
A mini kitchen need not be limiting.
With the right budget tiny kitchen living storage ideas, you can have an organized, practical and really attractive space without spending a fortune.
The key takeaways:
- Use wall shelves, pegboards and hanging racks to go vertical
- Incorporate your dead spaces — from corners to cabinet doors and fridge sides
- Maintain a cohesive color palette and ensure the containers match
- Focus on changes with the highest impact first (counters and shelves)
You don’t need to renovate. You don’t have to break the bank. You just need the right strategy — and now you have it.
Pick one of these ideas and do it today. Even a single change can transform the whole vibe of your kitchen.
Estimated total cost for all 12 upgrades: $170–$390 — a fraction of the price of even a modest renovation, and results that look anything but cheap.