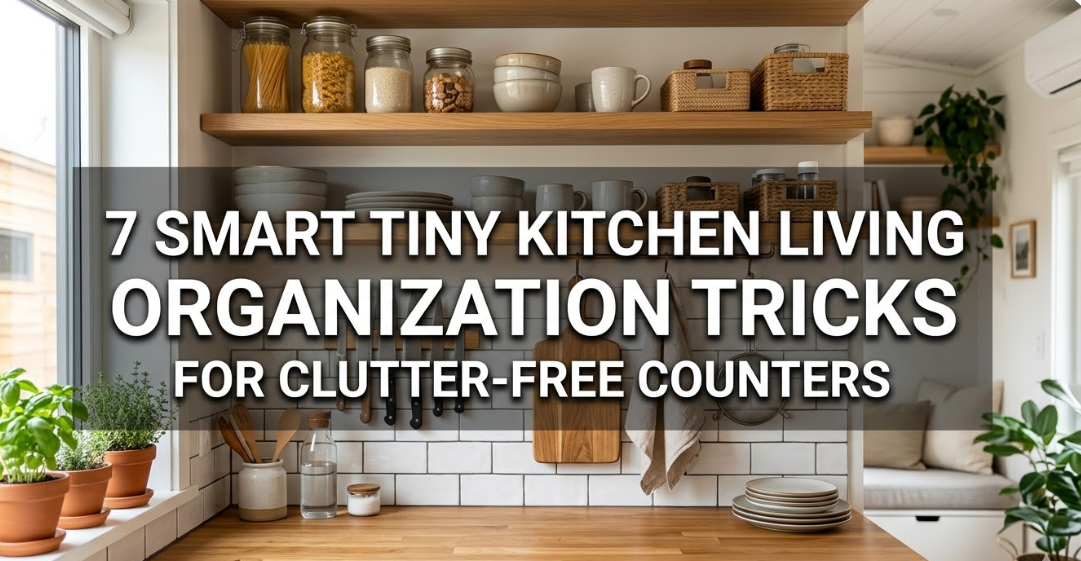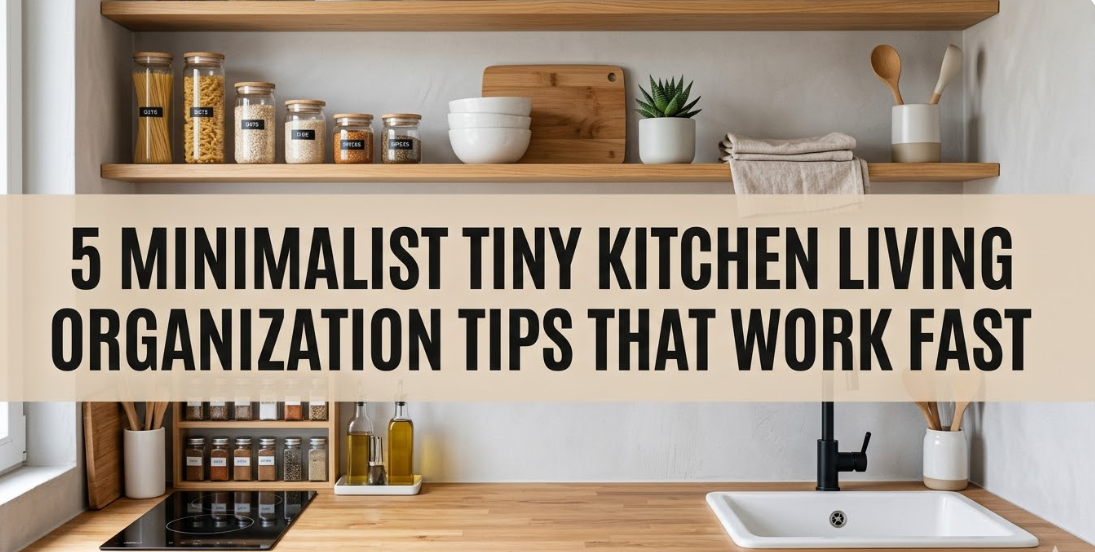
Meta Description: 5 Minimalist Tiny Kitchen Living Organization Hacks That Work In A Flash — convert your cramped cooking location to a tidy, usable sanctuary using these straightforward tried-and-true tips.
5 Minimalist Tiny Kitchen Living Organization Tips That Work Fast
You open the kitchen drawer and three things tumble out. There is no open area on the counter. The cabinets are so packed that every time you reach in, something tumbles out.
Sound familiar?
You don’t need to feel like you’re partway through a war each day in a tiny kitchen. Even the tiniest cooking space can pulse with calm, open air and be simple to use, with the right minimalist mindset.
This post gives you five life-changing, fast-working organization tips based around minimalist tiny kitchen living. No expensive renovations. No complicated systems. Just really smart and simple changes that stick.
Let’s get into it.
Minimalism Is the Secret Weapon for Small Kitchens
The average person believes a small kitchen is a storage problem. But it’s often a clutter issue in disguise.
When you own less and make sure to put things down in the right place, a tiny kitchen starts to feel less cramped. It starts feeling intentional.
Minimalism is not about making your home look like a magazine. It’s about holding on to what works for you and releasing what doesn’t. In a small kitchen, that pivot is everything.
Here’s a quick breakdown of what shifts when you apply minimalist principles:
| Before Minimalism | After Minimalist Organization |
|---|---|
| Counters are crowded | Counters clear and usable |
| Hard to find anything | Everything has one exact home |
| Cleaning takes forever | Wiping down takes less than 5 minutes |
| Kitchen feels stressful | Calm and in control |
| Duplicates take up room | Just the essentials remain |
The five tips below are listed by impact. Start from Tip 1 and work your way through. You’ll feel a difference fast.
Tip 1 — Declutter First With the “One In, One Out” Rule
Before you can plan to organize anything, you have to get rid of what you own.
This is the step that most people miss. They purchase drawer dividers and cabinet organizers before getting rid of what doesn’t belong. Then six months later, it’s all a mess again.
A true minimalist tiny kitchen living arrangement begins with a brutal, honest clear-out.
How to Get That Clear-Out Done in Two Hours
Put everything on the counter or kitchen table. Yes, everything. Pull everything out of each drawer, cupboard, and shelf.
Now sort into three piles:
- Keep — Used at least once within the last 30 days
- Maybe — Used a few times in the last six months
- Go — Not used in months, duplicates, or broken
Be ruthless with the “Maybe” pile. If you don’t recall the last time you used it, it goes in the “Go” pile.
Common kitchen things that silently take up space:
- Five spatulas when you only ever reach for one
- Coffee mugs you acquired back in college
- Single-function gadgets (avocado slicers, egg separators, cherry pitters)
- Duplicate sets of measuring cups and spoons
- Pots or pans you never use
Moving Forward: The One-In, One-Out Rule
Once you have your “Keep” pile set, make this your lifelong rule: before something new comes into the kitchen, something old goes out.
Buy a new pan? One old one goes. Receive a new set of mugs as a gift? Get rid of the ones you use least.
This rule prevents the gradual drift back into clutter. It’s the single most potent habit of minimalist tiny kitchen living.
Tip 2 — Assign ONE Permanent Home to EVERY Single Item
This sounds simple. Most kitchens don’t actually do it.
In a cramped small kitchen, things end up wherever there’s room. The olive oil moves next to the sink one day and to the back burner the next. The scissors appear in one drawer, then another, then on the counter — and who knows after that.
When things aren’t given a permanent home, it takes mental energy every day just to find stuff.
Zone Your Kitchen Like a Pro
The quickest way to assign permanent homes is by dividing your kitchen into activity zones.
Consider what you truly do in each area, then keep items associated with that activity right there.
Traditional kitchen zones for small spaces:
| Zone | What Happens Here | What Belongs Here |
|---|---|---|
| Coffee/Drink Station | Making hot and cold beverages | Mugs, coffee, kettle, tea bags |
| Cooking Zone | Stovetop cooking | Oils, spices, one or two pans |
| Prep Zone | Chopping and mixing | Cutting board, knives, mixing bowls |
| Cleaning Zone | Dishes and cleanup | Dish soap, sponge, dish rack |
| Food Storage | Dry goods and snacks | Canned goods, pasta, grains |
You can still apply zones even in a tiny kitchen. A studio with only a few inches of counter can still have a defined prep area and a small drink station.
Label and Lock It In
Use labels once you have zones set. A roll of masking tape and a marker does the job just as well as any fancy label maker.
Label shelves and bins inside cabinets. So when you toss something carelessly and don’t put it back right, the label tells you where it really belongs.
Zones give every item a home. Labels make that home permanent.
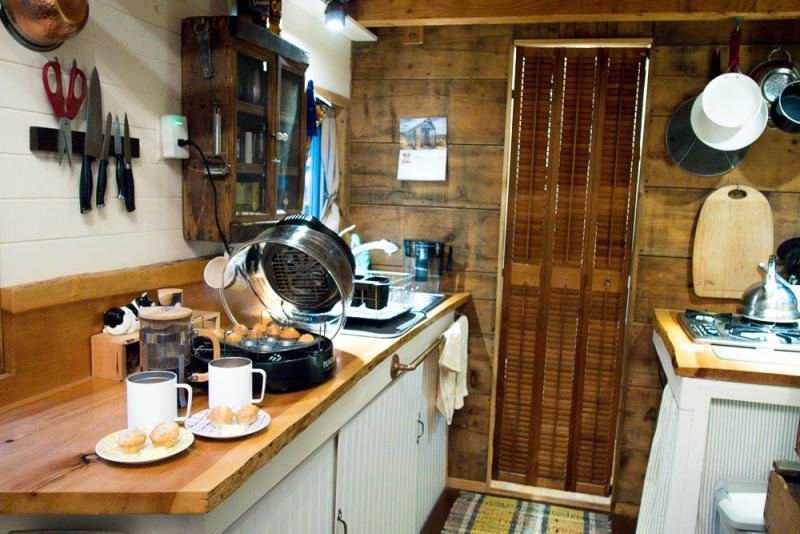
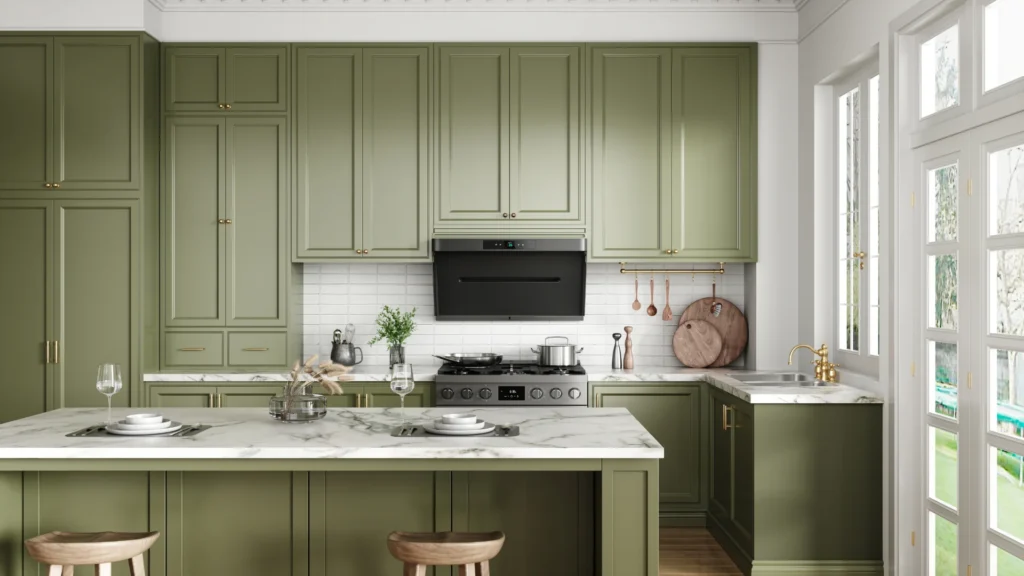
Tip 3 — Own Your Vertical Space
The footprint is always small in a tiny kitchen — floor space is at a premium. But the walls? Most people barely use them.
Vertical storage is one of the quickest wins in minimalist tiny kitchen living. It takes things off the counter and off the shelves, and gets them elevated where they’re visible and easy to grab.
If you’re looking for more inspiration on making the most of a compact cooking space, Tiny Kitchen Living is a fantastic resource packed with practical ideas for small kitchen layouts.
Five Vertical Storage Ideas That Actually Work
1. Magnetic knife strip mounted on the wall Free up an entire drawer. Knives are visible, safe, and within arm’s reach. Takes about 10 minutes to install.
2. Ceiling-hung pot rack or wall-mounted bar Pots and pans are among the bulkiest kitchen items. Getting them off shelves frees up a lot of cabinet space.
3. Tension rod under the sink Most people neglect the cabinet beneath the sink. A tension rod hung horizontally lets you hang spray bottles by the trigger, leaving the floor of the cabinet open for other items.
4. Hooks on the inside of cabinet doors The insides of cabinet doors are completely unused real estate in most kitchens. Affix small adhesive hooks or a mounted rack to hold measuring spoons, small lids, or cutting boards.
5. Floating shelves on blank walls Even one or two small shelves near the stove or prep area can hold spices, small bowls, or a plant. This keeps counters clear while adding a touch of personality to the space.
Think in Layers
Vertical thinking includes more than just walls. It’s about layering within your existing storage too.
Use stackable bins in cabinets. Use a small shelf riser inside a cabinet to create two levels from one. Add under-shelf baskets that clip onto existing shelves to create a second layer of storage underneath.
Every unused vertical inch is potential space waiting to be activated.
Tip 4 — Keep Your Counters at Near-Zero
Counter space is the most valuable real estate in any kitchen — but in a small kitchen, it’s an especially precious commodity.
In minimalist tiny kitchen living, the aim is to keep counters as nearly empty as possible.
That doesn’t mean putting everything away and making cooking harder. It means setting a high bar for what earns the right to live on the counter permanently.
The Counter Audit — What Stays, What Goes
Walk up to your counter right now and look at everything sitting there.
For each item, ask one question: “Do I use this every single day?”
If the answer is no, it doesn’t belong on the counter.
Here’s a helpful breakdown:
| Item | Counter-Worthy? | Better Alternative |
|---|---|---|
| Coffee maker | Yes (if used daily) | Keep it |
| Toaster | Maybe | Store in cabinet, pull out as needed |
| Knife block | No | Wall-mounted magnetic strip |
| Paper towel roll | Yes | Wall-mounted holder frees counter |
| Fruit bowl | Depends | Only if you keep it tidy |
| Mail and random stuff | No | Move to designated drop zone elsewhere |
| Small appliances (blender, etc.) | No | Cabinet or appliance garage |
The “Appliance Garage” Trick
One of the cleverest counter-clearing strategies is to create an appliance garage.
This is a designated space — generally a lower cabinet or a specific stretch of counter tucked near an outlet — where small appliances live. The blender, the air fryer, the stand mixer. They come out when needed, do their job, and go right back in.
When every appliance has a garage, none need to live on the counter permanently.
Clear counters are not only more aesthetically pleasing. They are actually easier to cook on, easier to wipe down, and mentally easier to be around.
Tip 5 — Make What You Cook and Store Simple
This tip goes deeper than drawer organizers and shelf risers. It’s about making what you store reflect how you actually live.
Most of the clutter piling up in small kitchens comes from food and cookware that doesn’t match the owner’s real life.
You have ingredients for 20 cuisines but make five meals on repeat. You own twelve pots but only ever use three.
Build a Capsule Kitchen Around Your Real Meals
A capsule wardrobe keeps only the clothes you actually wear. A capsule kitchen keeps only what you actually cook.
Start by writing down the ten to fifteen meals you prepare most regularly. Look at what ingredients and tools those meals really require. Those are your essentials.
Everything else — the exotic spice bought for one recipe two years ago, the specialty pan used once — can be donated, tossed, or put into long-term storage.
According to the New York Times Wirecutter, most home cooks only need a handful of well-chosen tools to handle nearly every meal they’ll ever make.
Sample capsule kitchen for the minimalist cook:
| Category | Capsule Essentials |
|---|---|
| Cookware | 1 large pot, 1 skillet, 1 small saucepan |
| Knives | 1 chef’s knife, 1 paring knife, 1 bread knife |
| Tools | Wooden spoon, spatula, tongs, whisk, peeler |
| Bakeware | 1 sheet pan, 1 baking dish |
| Pantry | Olive oil, salt, pepper, garlic, onion, canned tomatoes, rice, pasta, dried beans |
This isn’t restrictive. It’s freeing. When you open a drawer and see only what you use, finding things takes zero effort.
Keep Food Storage Honest
Pantry and refrigerator clutter is often invisible in conversations about kitchen organization, but it matters just as much.
Practice first-in, first-out. New groceries go behind older ones. This avoids that sad corner of neglected food at the back of the shelf.
Use clear containers for dry foods like rice, pasta, and oats. Being able to see exactly what you have and how much prevents over-buying and saves money.
Do a quick pantry sweep every two weeks. Toss anything expired. Rotate items near their use-by date to the front.
A minimalist kitchen isn’t only about what’s in sight. It’s about what’s behind the cabinet doors too.
The Takeaway — Your Fast-Start Plan
You don’t need to do all five tips in a single weekend. Follow this straightforward schedule for fast results without burning out.
| Day | Action |
|---|---|
| Day 1 | Complete the full clear-out. Sort into Keep, Maybe, Go. |
| Day 2 | Assign zones and label cabinet shelves |
| Day 3 | Install one or two vertical storage solutions |
| Day 4 | Do the counter audit. Move non-daily items off the counter. |
| Day 5 | Write your actual meal list. Reduce pantry and cookware to match. |
| Weekend | Fine-tune, adjust labels, and enjoy the new space. |
Five days. Real change. No massive renovation required.
The Mindset That Helps You Stick With It
Organization without the right mentality is just temporary tidying.
What makes minimalist tiny kitchen living permanent is a shift in your attitude towards stuff.
Stop seeing kitchen clutter as normal. A clear counter is normal. A drawer you can open with one hand is normal. Being able to locate the thing you want in under three seconds — that’s normal.
Every time you go looking for something and it’s right where it should be, that is the system working. Every time you pass on buying a gadget you don’t need, that’s the mindset working.
Tiny kitchens can be gorgeous, highly functional spaces. What they need is clear thinking and consistent habits — not more square footage.
Minimalist Tiny Kitchen Living: FAQs
Q: I rent my apartment and can’t drill holes or make permanent changes. What can I do?
Many vertical storage solutions are drill-free. Removable hooks, tension rods, over-the-cabinet-door organizers, and freestanding shelves all work in rental kitchens. Most removable adhesive products today hold a few pounds and come off walls without leaving residue.
Q: What should I do if my partner or family members don’t practice minimalism?
Start with your own items. Show results before preaching systems. Often when they see how calm and functional the space becomes, people are more open. Focus on shared spaces with shared goals — like clearing the counter — rather than trying to force changes on personal items.
Q: I do a lot of cooking and entertaining. Will a minimalist kitchen leave me without what I need?
A capsule kitchen is tailored to the actual way you cook, entertaining included. If you’re a regular dinner-party host, the essentials list simply includes a few more serving pieces and one bigger pot. Minimalism isn’t about owning the least amount of things possible. It means having just what you need and nothing more.
Q: How do I keep the kitchen organized after I set it all up?
The one-in, one-out rule is your best friend here. Also, do a five-minute reset every night — put everything back in its zone, wipe the counter, and start fresh the next morning. Once the system is in place, the daily reset takes less than five minutes.
Q: What’s the very first thing I should do if my kitchen feels completely overwhelming?
Just clear the counter. Completely. Put everything in a box or on the kitchen table for now. Then look at the empty counter and notice how you feel. That feeling is your motivation. Work outward from there.
Q: Are there any must-have products for a minimalist tiny kitchen?
Keep purchases minimal and intentional. The items most worth buying are: a magnetic knife strip, a few clear airtight containers for pantry staples, stackable cookware, and removable hooks for vertical storage. Don’t buy organizational products until after you’ve done the clear-out — otherwise you’re just organizing clutter more neatly.
Wrapping It Up
Minimalist tiny kitchen living is not a design trend. It’s a practical solution to a very real everyday frustration.
When you eliminate the excess, give homes to what you have left, use your vertical space, keep your counters clean, and simplify what you cook and store — your kitchen transforms. Not because you added anything. Because you finally cleared the path to what was already there.
Start today. Start with the counter. Start with one drawer.
The space you’re after already exists. You simply need to remove the roadblocks.